Shields
Meshes
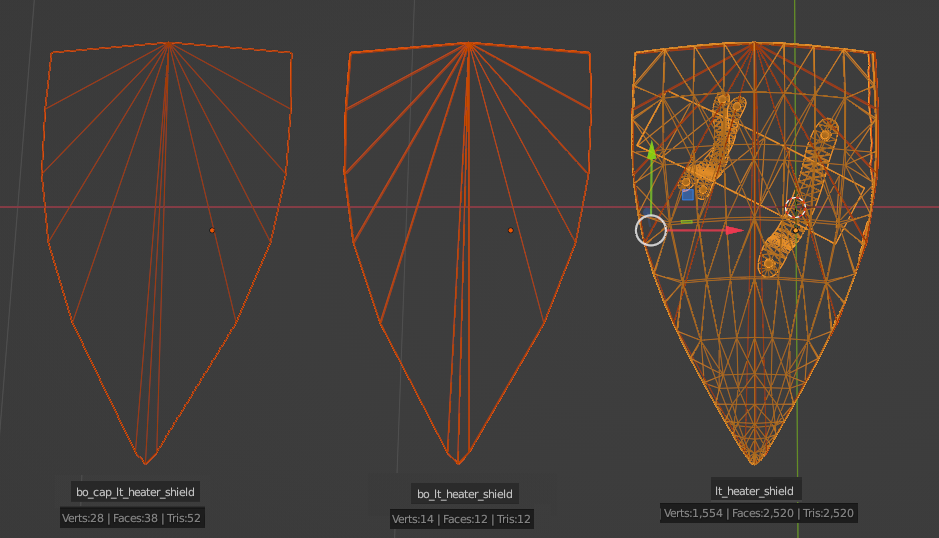
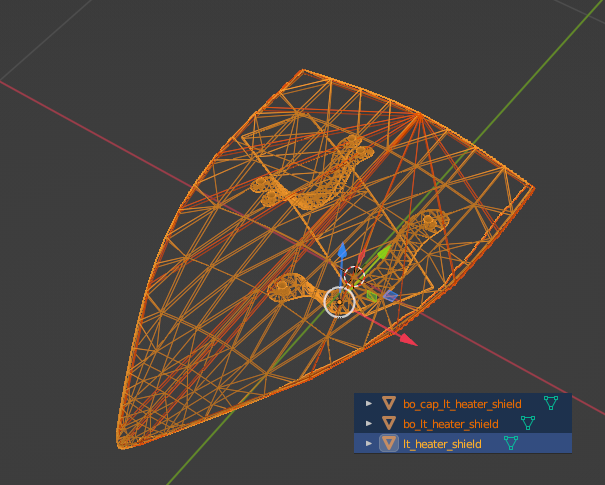
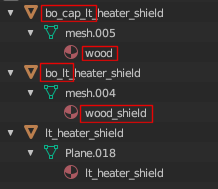
Shields require 3 meshes/models for full implementation: the mesh for visuals, and two physics meshes.
Note: they are moved to the sides for a preview, when putting into the game they should be aligned in the same space.
- bo_cap_SHIELDNAME (bo_cap_lt_heater_shield in the example) is likely the ragdoll hitbox for the shield
- bo_SHIELDNAME (bo_lt_heater_shield in the example) likely is the hitbox for projectiles and melee
- SHIELDNAME (lt_heater_shield in the example) - the model that is going to be seen by the player
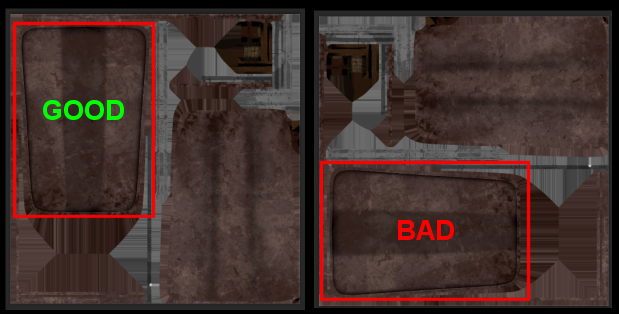
Triangle count is important for the physics calculations, more polygons means a lot more calculation by the engine, so low is key.
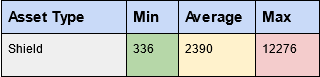
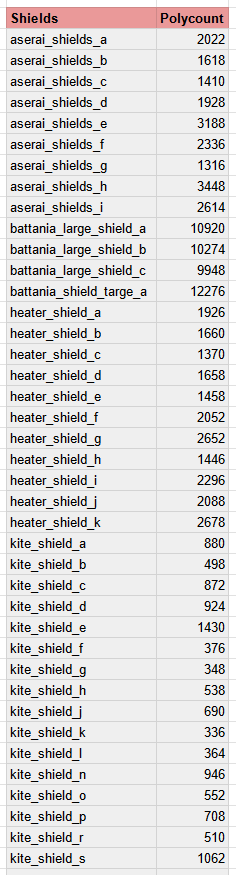
Native shield's polycount:
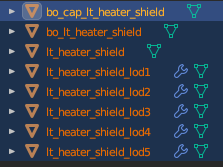
Export
Final export to FBX should look like this:
Positioning
Position within the 3D space of your modeling program is important.
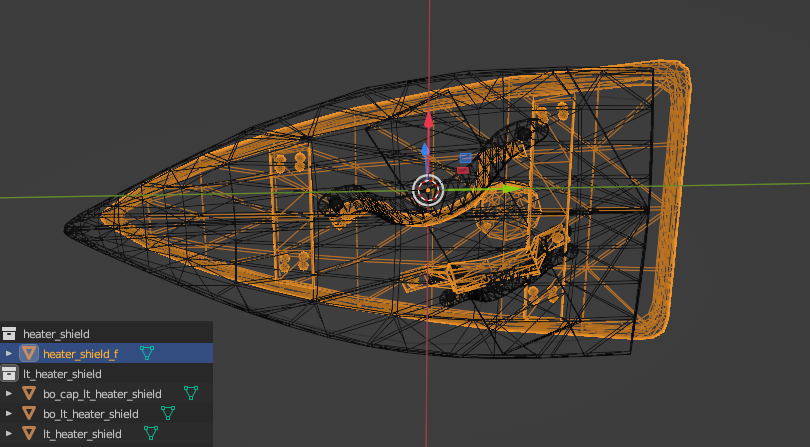
All three meshes in the same position:
It’s best to use a shield close to what you want to implement. Make sure to copy the position, center line, and hand grip.
Here I used native heater_shield_f to help me position my shield and adjust it's hand grips:
Hand grips
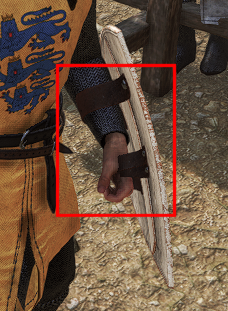
Properly adjusting hand-grips is very important to make shield look normal in the game. I had to move my shield's handgrips closer to the center and increase one handgrip to minimize clipping in-game:
You will be able to fine-tune the position and rotation in the XML settings.
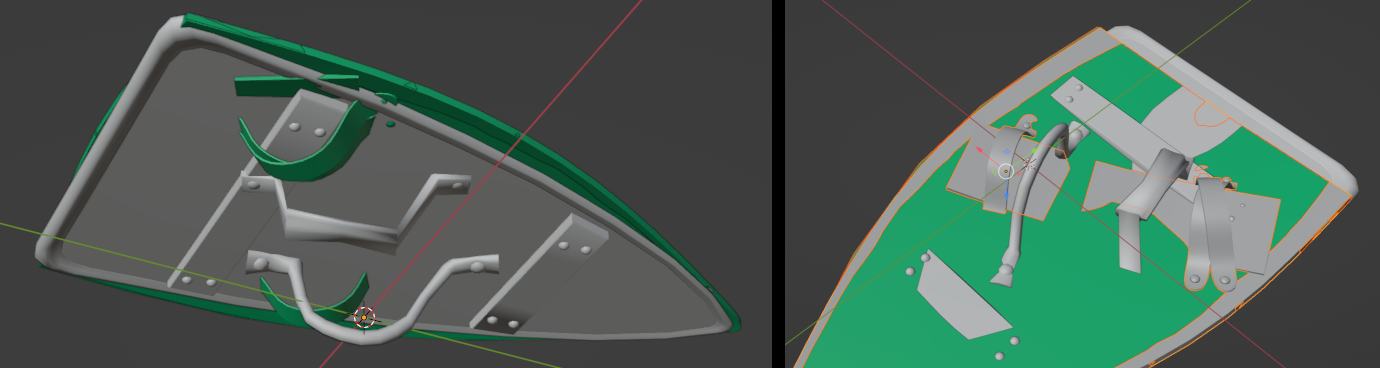
Bulky gloves good for testing grips and clipping:
Material
Naming
These physics meshes require their material to be named in the following way:
- bo_cap_SHIELDNAME needs its material to be called “wood”
- bo_SHIELD needs a material “wood_shield”
- SHIELDNAME material can have the same name: SHIELDNAME
Renaming is done in your 3D program, when imported to the Editor, it’ll automatically assign the material you have named.
Make sure you create a matching material in the Editor before you import your FBX. If not - you will get many errors and will have to assign material to all the LODs by hand.
Orientation
If your texture is rotated 90 degrees - that would be the problem if you will want to place a sigil on the shield, because there is no way (at least in my knowledge) to rotate the sigil on the shield 90 degress in the Vector Argument 1 settings.
I had to rotate textures and UVs in the Blender to fix this.
Material in the Editor
Example settings for the shield's material in the Editor:
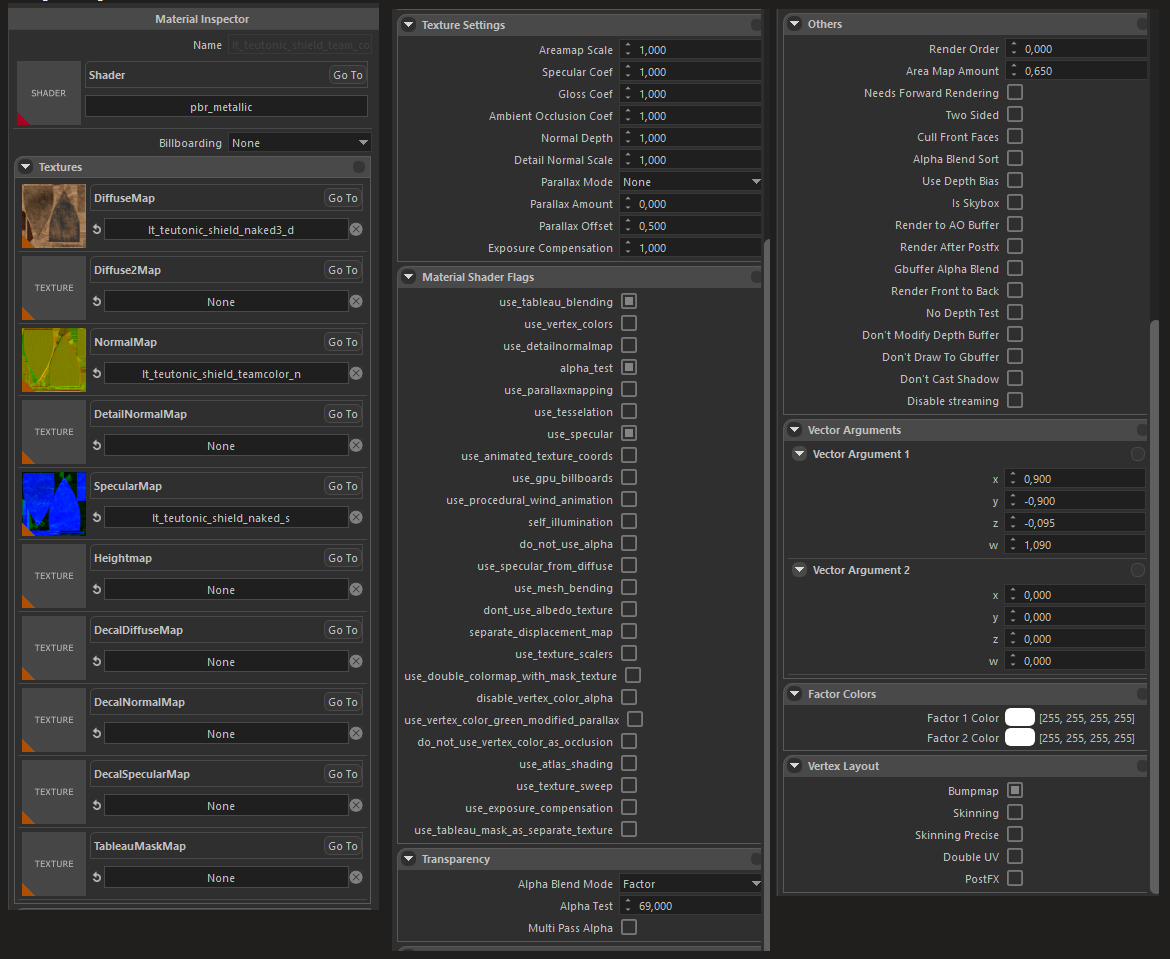
- use_tableau_blending is used to add clan's sigil
- alpha_test and Transparency settings - to make diffuse layer transparent for clan's sigil to appear
- Vector Arguments1 - to properly position clan's sigil
- Vertex Layout - Skinning should be disabled
If you don't need clan's sigil - you can use the same settings as above, or:
- use_tableau_blending can be off
- alpha_test off
- Transparency settings - off/does not matter
- Vector Arguments1 - all 0/does not matter
- Vertex Layout - Skinning should be disabled
Clan's Sigil

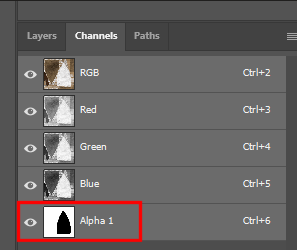
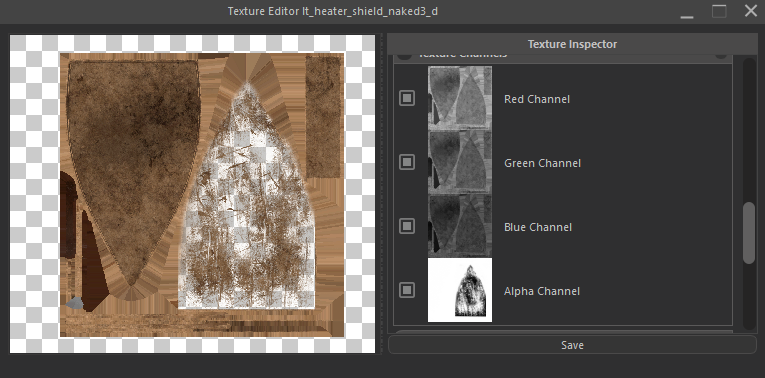
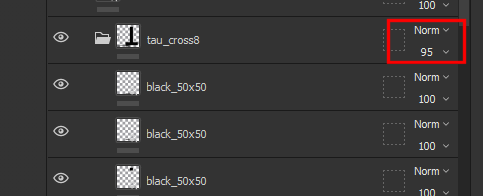
Emblem/sigil for shields is applied by adding an alpha channel to the diffuse texture of the shield material and painting alpha where the sigil is desired.
Alpha channel can be added in the Photoshop:
Alpha channel examples:
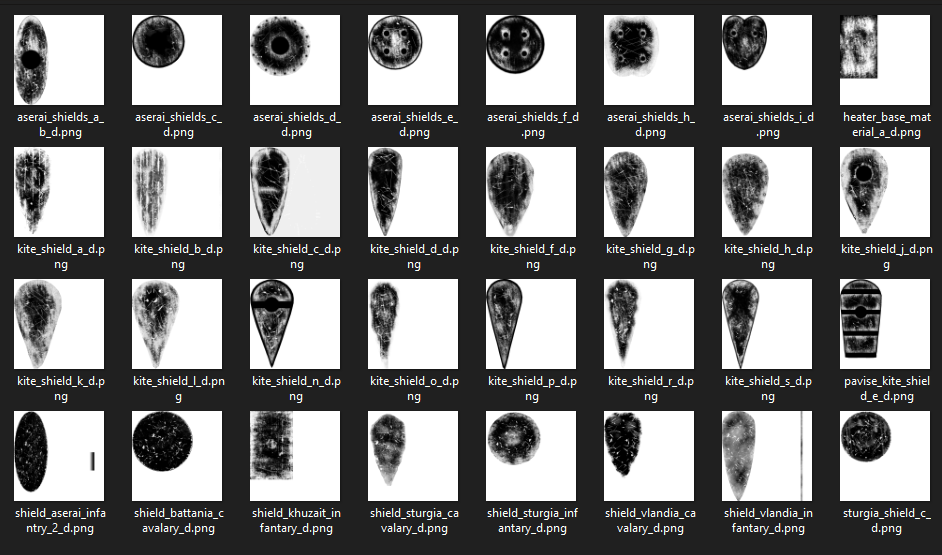
Alpha channels for shields can be extracted with TpacTool from the native assets:
When extracting with TpacTool, save as DDS, and when importing into Photoshop, mark Load Transparency as Alpha channel:

Download some of the native alphas from here
Save modified DiffuseMap texture as PSD to properly save Alpha channel and import PSD into the Editor:
When creating a material, make sure you have use_tableau_blending ON, alpha_test ON and adjust transparency with Alpha Blend Mode: Factor and Alpha Test > 0:

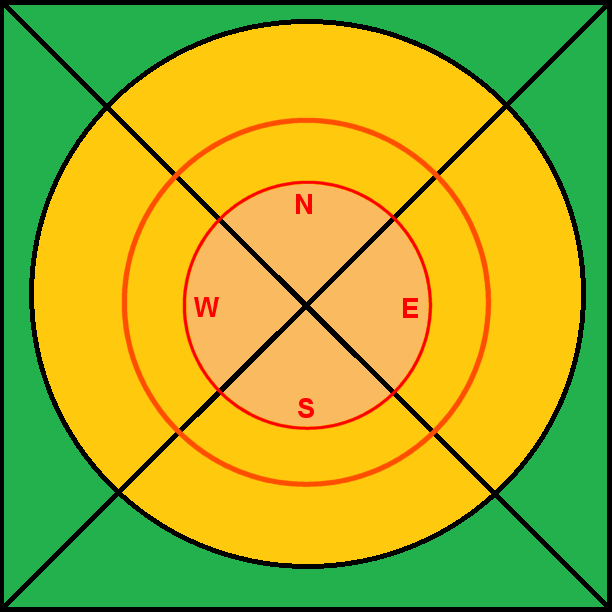
The clans's sigil/emblem is added to the shield by adjusting Vector Argument 1 under the Vector Arguments tab on the material. x, y determines the position. z, w determines the scale.
From Preview Mesh select Plane for better visualization.
In Diffuse2Map add sigil_test_bounds_for_shields for better positioning (Inner circle shows the place where the sigil will be present). This is quick and easy way to properly position the sigil.
Take it from here:
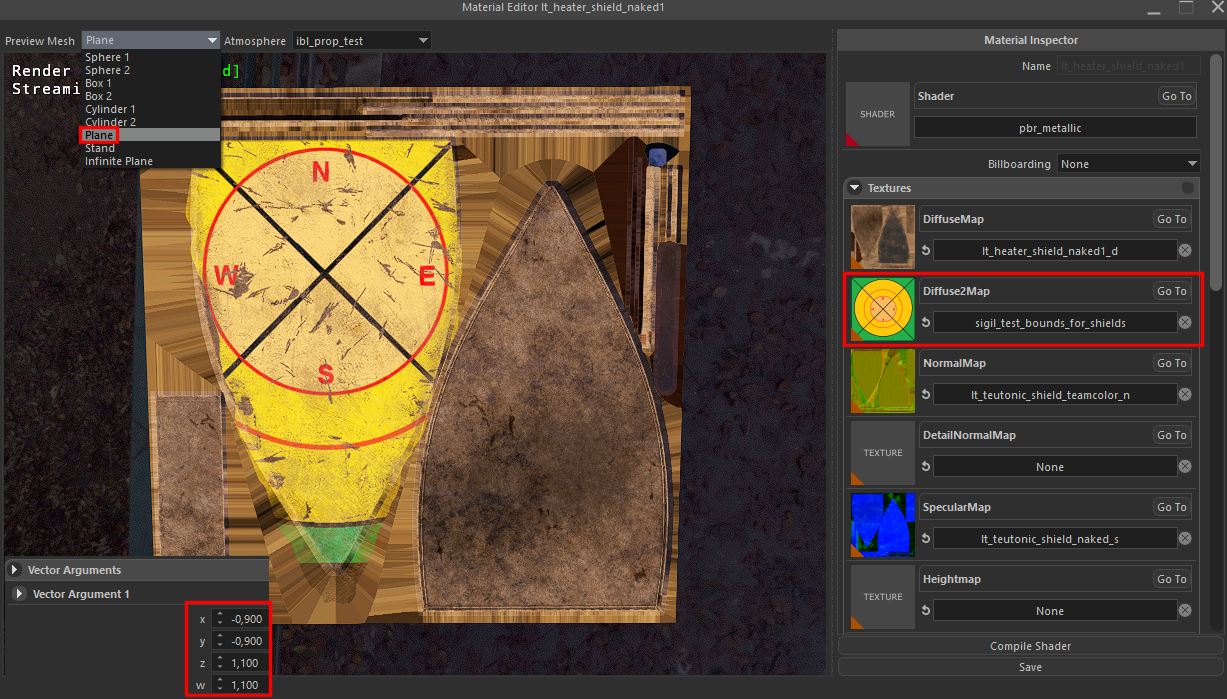
If you need to turn the sigil upside down, use minus sign for the y field in the Vector Argument 1. Mirror reflection - use minus x. Couldn't find the options to rotate 90 degrees though...
When the sigil is placed properly - REMOVE the Diffuse2Map and Save your material. Otherwise you will see this yellow picture instead of your real sigil in-game.
Problem: Red artifacts
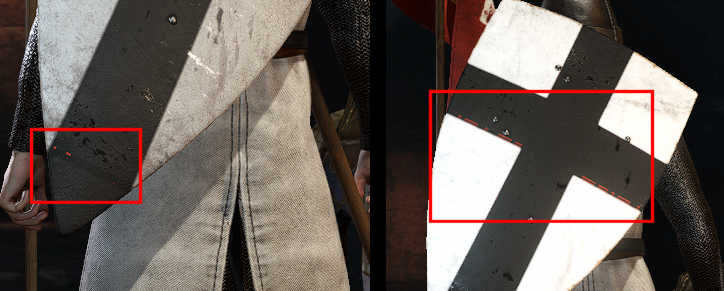
Cause: BLACK is too black here :) (#000000 I guess)
Solution - make it less black:
XML
<Item
id="flat_heater_shield"
name="{=ap2yulQ2}Flat Heater Shield"
body_name="bo_cap_heater_shield_f"
shield_body_name="bo_heater_shield_f"
recalculate_body="false"
mesh="heater_shield_f"
culture="Culture.vlandia"
using_tableau="true"
weight="4.7"
appearance="1"
Type="Shield"
item_holsters="shield:shield_2:shield_3:shield_4"
has_lower_holster_priority="true"
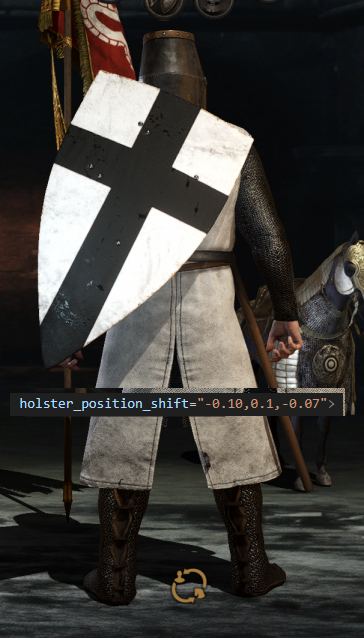
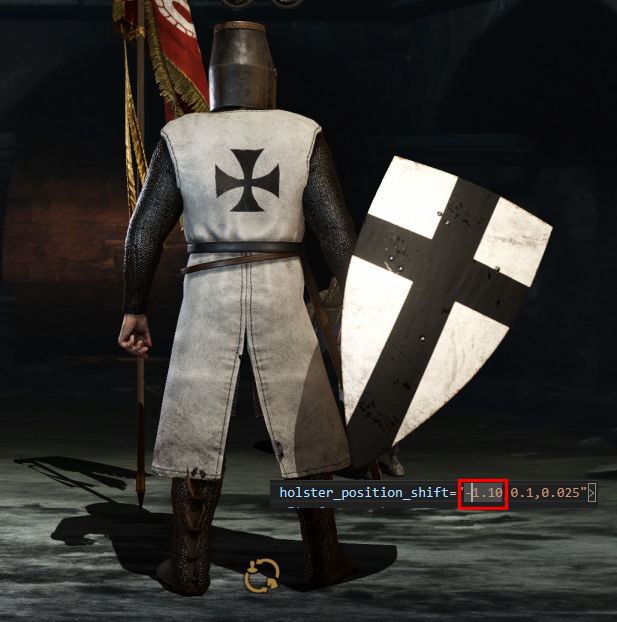
holster_position_shift="-0.10,0.1,0.025">
<ItemComponent>
<Weapon
weapon_class="LargeShield"
body_armor="10"
thrust_speed="82"
thrust_damage_type="Blunt"
speed_rating="93"
physics_material="wood_shield"
item_usage="shield"
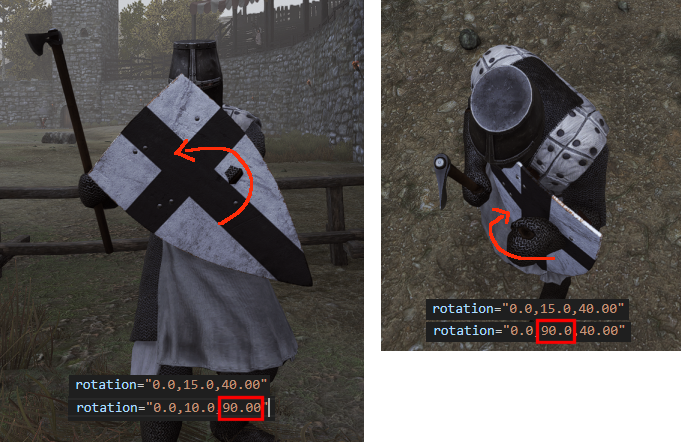
position="0.0, 0.00, 0.00"
rotation="0.0,10.0,40.00"
weapon_length="90"
center_of_mass="0.0,0.1,0.05"
hit_points="310"
modifier_group="shield">
<WeaponFlags
CanBlockRanged="true"
HasHitPoints="true" />
</Weapon>
</ItemComponent>
<Flags
WoodenParry="true"
HeldInOffHand="true"
ForceAttachOffHandSecondaryItemBone="true" />
</Item>
Make sure to reference your physics meshes in mesh, body_name and shield_body_name.
recalculate_body - every Taleworlds shield has false, perhaps there is a hidden function here.
weapon_length - Each shield has a weapon_length, 'kite_shield_e' here for an example, has a length of 118. When measured in Blender, this number comes to roughly 125, a clear discrepancy. I cannot extract the physics mesh to measure, so perhaps this is the length of that. Or there is another purpose behind the length, and an easy way to calculate it.
weapon_class - “LargeShield” The only option for weapon_class. Perhaps this is an unfinished feature, as the prefix of ‘Large’ suggests other shield types within the weapon_class. Or perhaps this is only a way to differentiate shields from other equipment types.
physics_material - “wood_shield” “metal_shield” Changes the sound effects used by the shield.
item_usage - “shield” “hand_shield” Unsure about the differences between the two, perhaps animation.
using_tableau ="true" - without it the sigil will not appear in-game
This should NOT be present: <Flags UseTeamColor="true"/>
item_usage
Possible values: “hand_shield” / “shield”
Determines how the shield is held in the hand and affects the troop's pose.
hand_shield - The shield is held only with the palm of the left hand (e.g., round shields, large Battanian shields).
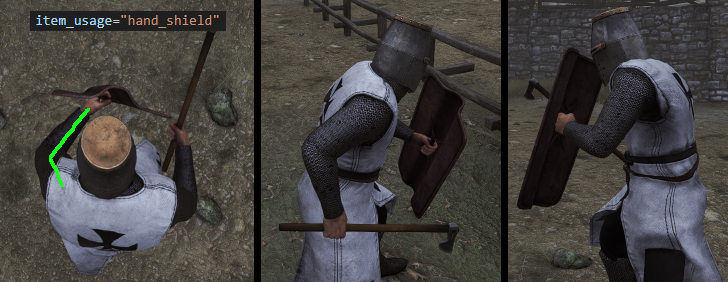
shield - The shield is held with the arm and the palm of the left hand (e.g., heater shields, kite shields).
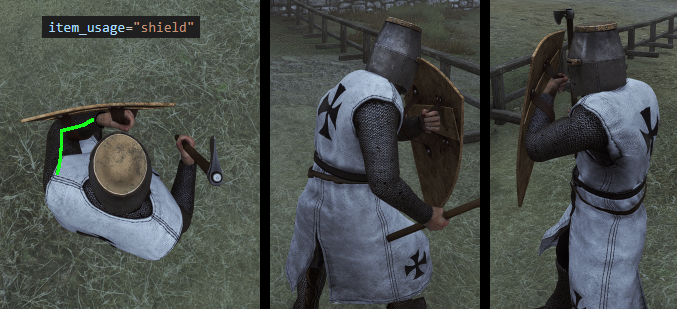
An example with item_usage='shield' when correct value should be 'hand_shield':
position
Position when the shield is used.

rotation
Rotation when the shield is used.
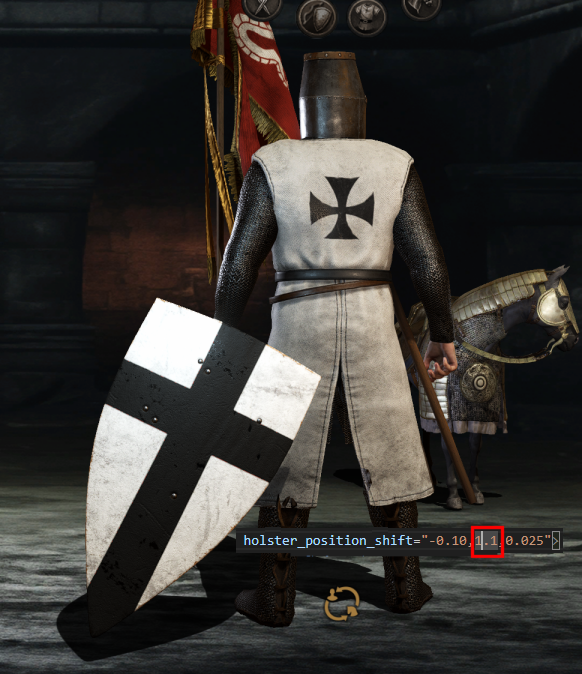
holster_position_shift
Sets the shield's holstered position on the troop's back.
Adjustments:

Workflow
-
Export with TpacTool the most similar shield as EXAMPLE
-
Import into the Blender
-
Import own model into the Blender
-
Position own model in the Blender the same way as EXAMPLE model
-
Modify the handles/hand grips to match the EXAMPLE model as close as possible
-
Rename all parts properly
-
bo_cap_SHIELD material rename to "wood"
-
bo_SHIELD material rename to "wood_shield"
-
rename SHIELD material
-
generate LODs for SHIELD
-
Export FBX in BL format
-
Import textures in the Editor
-
Create material
-
Disable skinning
-
Import FBX
-
Adjust Sigil if necessary
-
Add XML
-
Position shield properly
-
Test in-game/fix/repeat