Paths
- Basic World-mapping by NPC99.
- Comment créer une World Map by Le Profyteur
Paths are a set of connected points. Can be used for sound, rivers, roads, etc.
Create
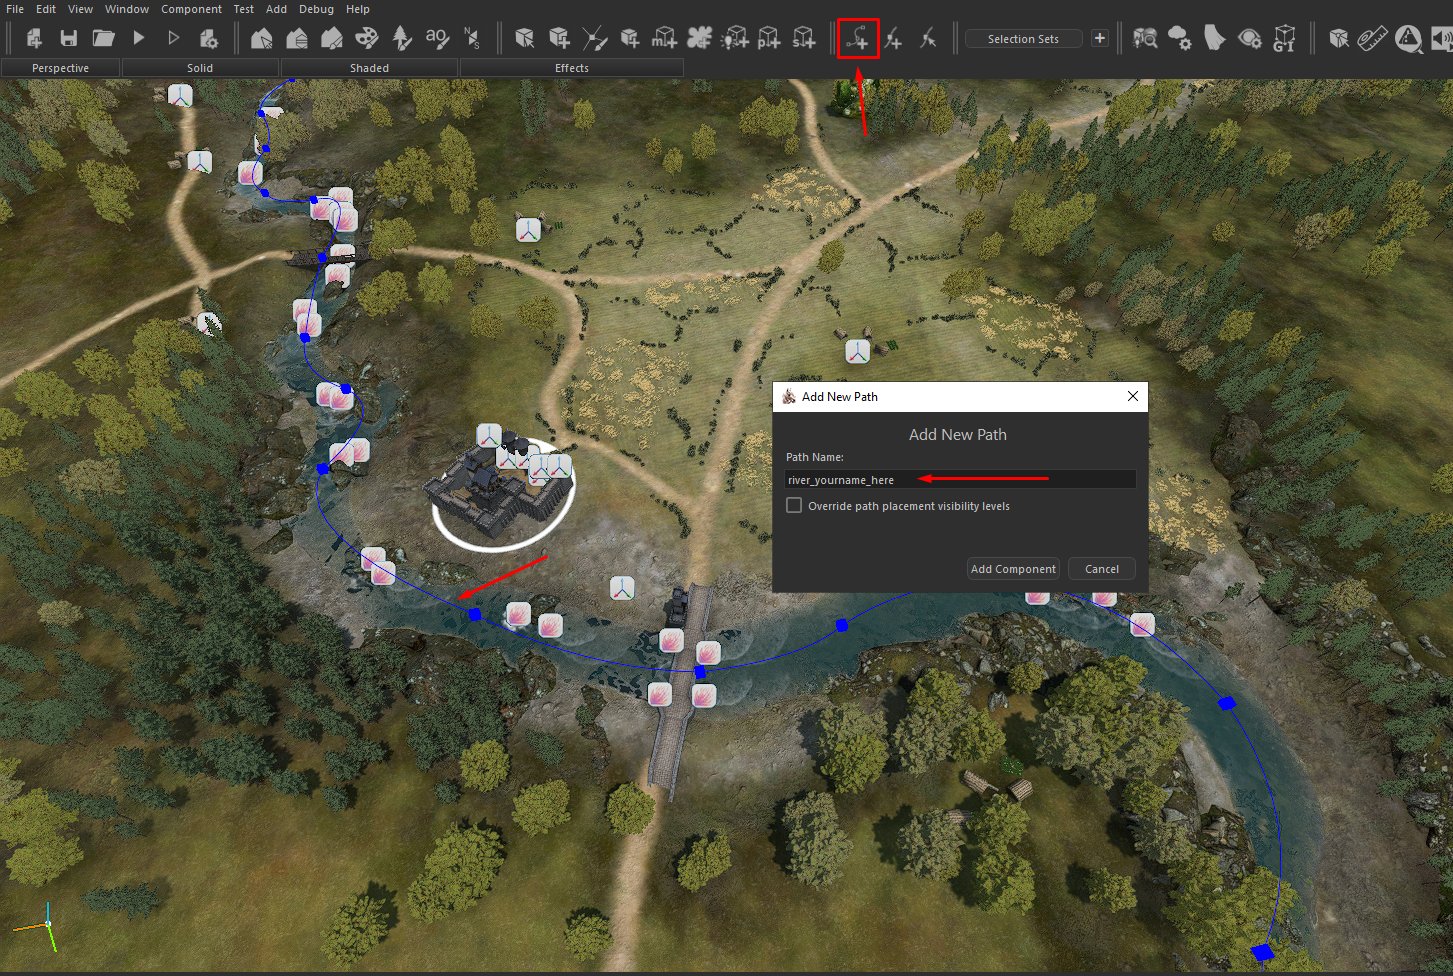
Create a new Path and give it a name:

Make sure Helpers are visible - h button to turn then on/off or:

Using this you can start placing your points. Each point controls the path (elevation, angle, curve, etc.), so don't be afraid to add a few more (not too many either, as the more points there are, the more adjustment work you'll have to do):


Add a new point between 2 other selected points if necessary using this:

Control/Adjust
You now need to change the type of path you're using: in interpolation mode, change to Cubic hermit or Quadratic hermit:
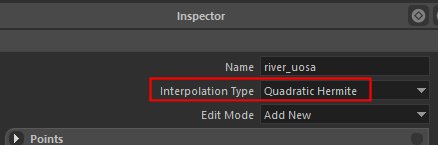
Changing the path mode will allow you to curve your paths. To save a little time, you can use the Do Auto Curve (works bad) option, which will curve the path for you, but you still need to check the points and adjust them a little by hand, especially the attitude of the points. If you are building a river - it must be flat, otherwise it will look bad.

As you have placed your points directly on the ground, they are not at the same height or on a gentle slope, so you need to correct the altitude of each point before going any further.
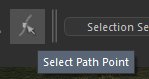
Select one point:
Adjust the points to make a nice curve. You can now set and move each point individually. When you click on a path point, control points appear, which you can use to adjust the curve and height:
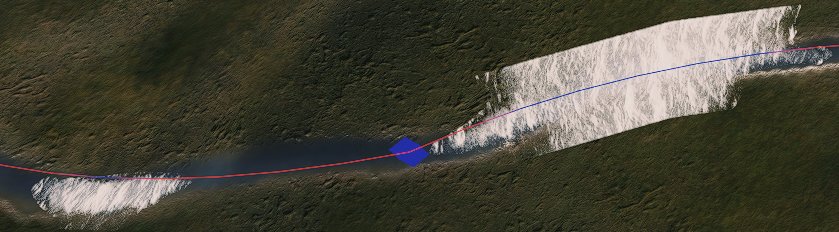
Red line indicates that the point is lower than terrain:

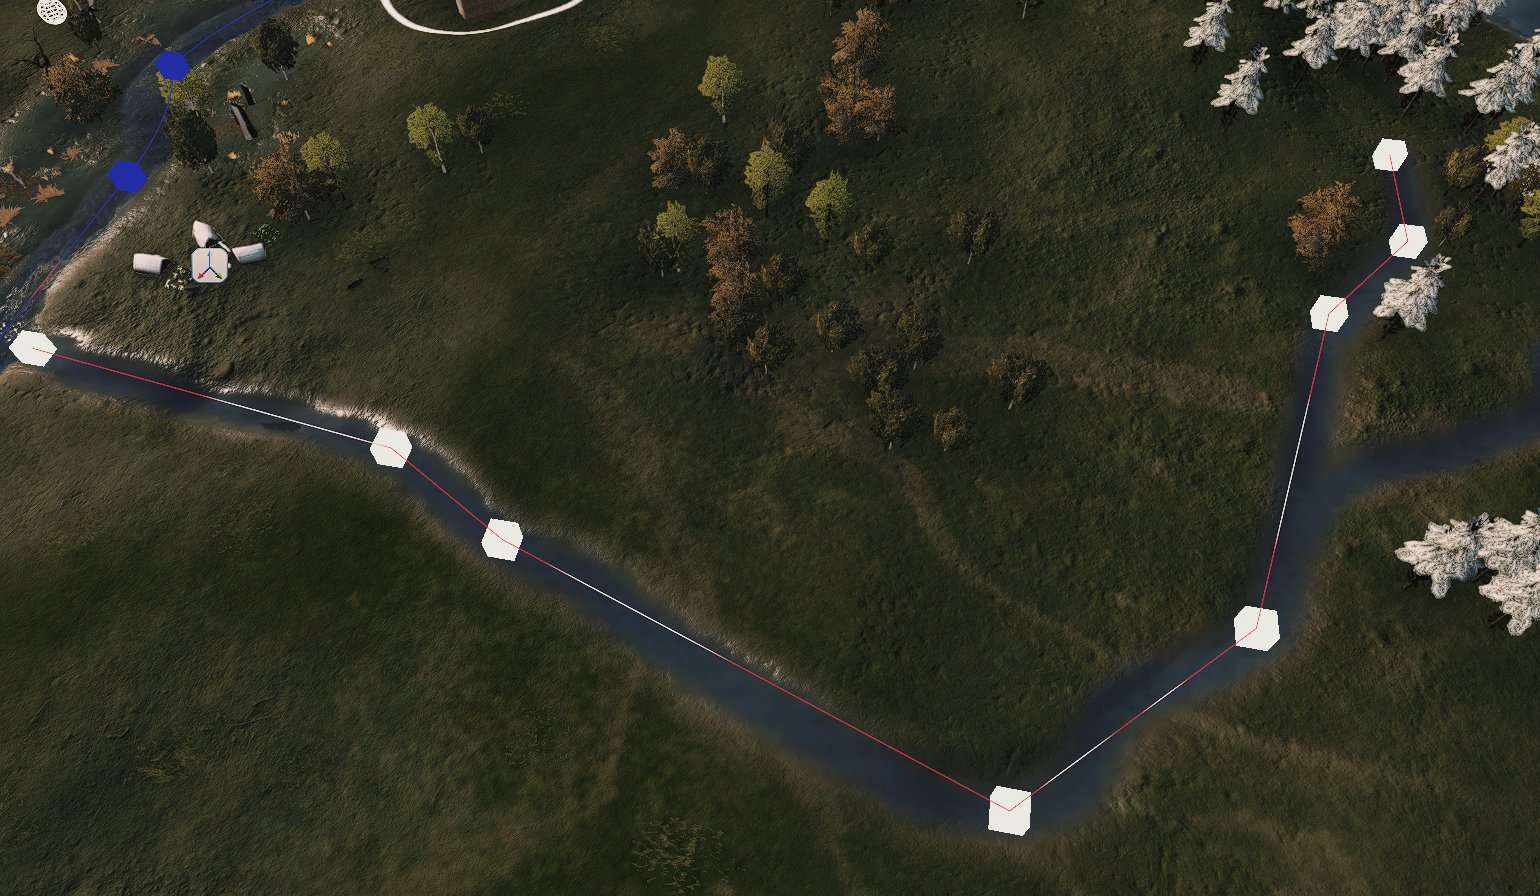
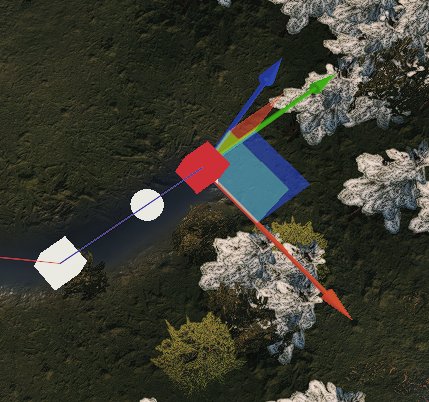
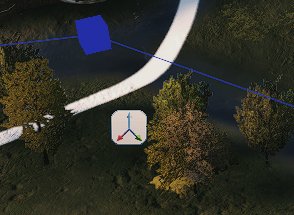
To control the path, when you click on a point you should see a little ball show up, the little balls are the points and control the spline, here is an image that might make help explain what they do

Basically the boxes are points that the line will travel through, the spheres control how the line bends. So I can move the sphere far away and the path will curve towards it.
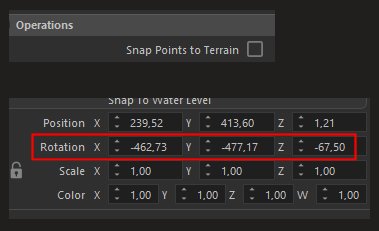
DO NOT USE Snap Points to Terrain
Because it will mess up your points:
Closed loops
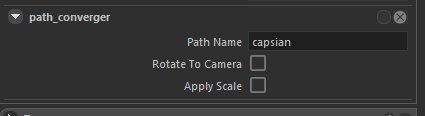
Paths around lakes can be converted from lines into closed loops by the path_converger script.
WHY?
Sound
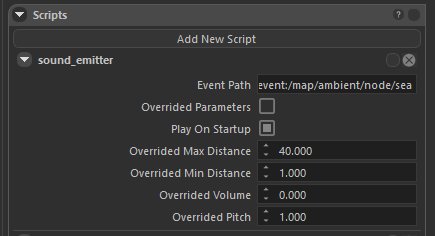
sound_emitter script can be attached to the Path using path_converger script. What it does it moves the sound emitter on that path with the camera. TW use it for river and coastlines sounds.
Rivers
To create a river, you'll need Path & a road_instance script.
First of all, you need to draw a path at the location of your river, as it's this path that will create the mesh that will make up your water.
To do this, click on the "add path" button and then give your path a name.
Add a river_ suffix before the path name, so that you can find it more easily later
Adjust the points till you get a nice curved river.
Once your path seems correct, Save! because the rest of the operation can be destructive!
road_instance
Go to the prefab tab and type road_instance:

Click on road_instance place it near your river (click near the river, do not drag):
Choose Select Entities:

Select Inspector:

Click on the road_instance icon you placed near your river and rename it to river_YOURRIVERNAME_road_instance to make it easier to find:
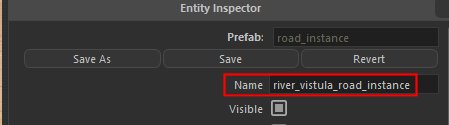
(renaming the script and path in the same way makes it easier to search later if you need to modify the river)
Good time to SAVE again!
Open the road_instance script options:
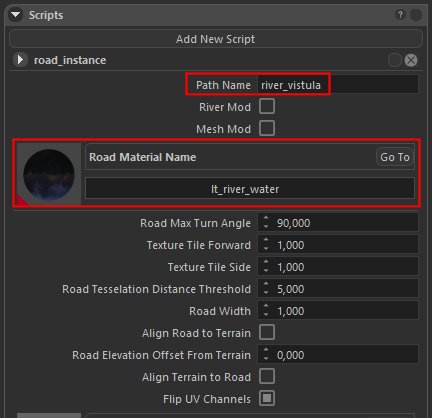
Set Path name: the exact name you have given to your path
Road material Name: put a water material. You can start with water_main_map
You have a whole host of parameters that allow you to adjust the texture's visual appearance. Most important:
- Road Width: width of your river
- Road Elevation Offest: artificial elevation above the path
Align road to terrain: drops your path on the terrain. Not sure if it's suitable for rivers, maybe to draw roads, because with this options rivers are the same width, problems making edges, etc.
Align terrain to road
Allows you to match the terrain to your path, for example, to make your river pass through relief. Use only when your river is already aligned very closely with the terrain.
CAUTION: It messed my terrain so much, and CTRL+Z did not work, unchecking the option did not work, I had to reload
Extreme example:

When the box is checked, the path modifies the terrain over the width (Road Width) you've previously set and over the entire length of the path, following the elevation levels you've set, continuously until you uncheck the box.
Once you're happy with your river (slope, curve, width, etc.), remember to uncheck the parameter. Align terrain to road, which will enable you to refine the banks and adjust the width to avoid holes in the river mesh.
Additional info:
-
don't delete the road_instance script after building your river, as you'll simply delete your river.
-
one road_instance script per river
-
you can place prt_shore_foam prefab along your river to simulate flow, which here is normally handled by the water_flowmap
-
nothing prevents you from creating waterfalls with your path and a little time
-
all these explanations are also valid if you want to create roads, or pathways to place fences for example, it's up to you to try and get to grips with the script
Materials
If water is not visible, try to recreate the river without any transformations. Example here.
water_main_map
Nice blue with nice water like waves:
PROBLEM: from Autumn 15 till Spring 15 it's white, like ice because it uses map_water shader

I ended up copying all the settings from water_main_map and creating my own water material with shader 'water' - so no ice in winter. Dynamic Weater effects cover the shores in snow and it looks good enough (for me).
empire_street_fountain_pool_water
White and bright water material - very useful to work in the placement mode, when path points are adjusted - clearly shows the borders. Later when my river is done, I change this material to my custom one.